Digital workflows are transforming the way crown and bridge restorations are produced—enhancing precision, consistency, and traceability across every stage. As more clinics and procurement teams evaluate outsourcing or lab partnerships, the focus is shifting from cost alone to process maturity and repeatability.
From high-resolution intraoral scans to CAD-driven design and digitally verifiable quality controls, each step in a digital workflow directly contributes to reducing remakes, minimizing chairside adjustments, and improving long-term clinical outcomes.
This article explores five key areas that determine whether a dental lab is truly equipped for consistent, scalable crown and bridge production:
- How margin clarity improves through digital scanning and verification
- The role of CAD software in standardizing contacts, occlusion, and emergence
- Submission protocols and STL formats that influence restoration accuracy
- Built-in lab-side quality controls that track, validate, and document each case
- Collaboration tools that reduce revision cycles and improve turnaround reliability
Understanding these elements is essential for identifying digital-ready labs that can consistently meet both clinical and operational expectations—especially in high-volume, multi-site dental environments.
What Are the Common Sources of Inaccuracy in Traditional Crown and Bridge Fabrication?
Traditional crown and bridge workflows often suffer from inconsistencies due to manual impression errors, analog data transfer gaps, and technician interpretation variability. These issues are especially problematic in multi-unit cases where margin accuracy and occlusion consistency are critical for long-term fit and function.
Understanding these common failure points helps clinics evaluate why digital workflows may offer more predictable outcomes. Based on cases we’ve received from various regions, three specific risk areas are most often responsible for remakes and chairside adjustments.

traditional-impression-lab-errors
Manual impression inconsistencies and margin errors
In traditional workflows, impression materials are vulnerable to deformation and data loss—especially at the margin line. The most frequent issues include:
- Air bubbles or margin tears caused by soft tissue retraction failure
- Distortion from impression tray removal before full set
- Dimensional changes during transport due to heat or time
- Incomplete capture of subgingival detail due to blood or saliva contamination
In our lab, we’ve reviewed thousands of analog cases, and margin ambiguity appears in roughly one-third of posterior crown submissions. Technicians are then forced to estimate the margin, which can lead to poor seating, compromised cement seal, and soft tissue irritation.
Analog data transfer limitations between clinic and lab
Analog workflows rely on physical documents and models, creating multiple failure points in communication and accuracy.
| Common Gap | Resulting Risk |
|---|---|
| Handwritten instructions | Misinterpretation of shade or margin details |
| Missing intraoral photos | No visual reference for anatomy or margin exposure |
| Shipment delays or damage | Broken or distorted plaster models |
| No preview/feedback mechanism | Issues discovered only at final seating |
Without upstream verification or feedback loops, errors often go unnoticed until the case is already milled and delivered—too late for correction without remake.
Variability in technician interpretation and tooling
When cases lack digital guidance, technicians must rely on subjective judgment. Even experienced teams introduce variability when interpreting ambiguous inputs.
In one case from a partner clinic in Western Europe, a 3-unit bridge order arrived with no occlusion record and unclear contact instructions. Despite two clarification calls, the final crown required chairside grinding due to occlusal interference. These scenarios reflect a core limitation of traditional workflows: they rely too heavily on individuals compensating for system gaps.
Despite the craftsmanship of analog methods, they are inherently prone to inconsistency. Errors in impressions, transfers, or technician interpretation often compound each other, leading to costly delays and chairside fixes. For clinics aiming to reduce remake rates and improve workflow predictability, understanding these root causes is the first step toward meaningful change.
How Do Digital Impressions Improve Margin Clarity and Overall Precision?
Digital impressions improve crown and bridge accuracy by capturing sharper, distortion-free margin details and allowing real-time verification before submission. Unlike analog impressions, digital data can be instantly reviewed, adjusted, and validated at both clinic and lab ends—dramatically reducing misinterpretation and remakes tied to unclear margins.
In our day-to-day lab workflow, the difference between a clear STL file and a flawed silicone model is immediately obvious. We’ve worked with clinics that switched from analog to intraoral scans and saw margin-related adjustment cases drop by over 40% within the first 3 months. Here’s how that improvement happens.
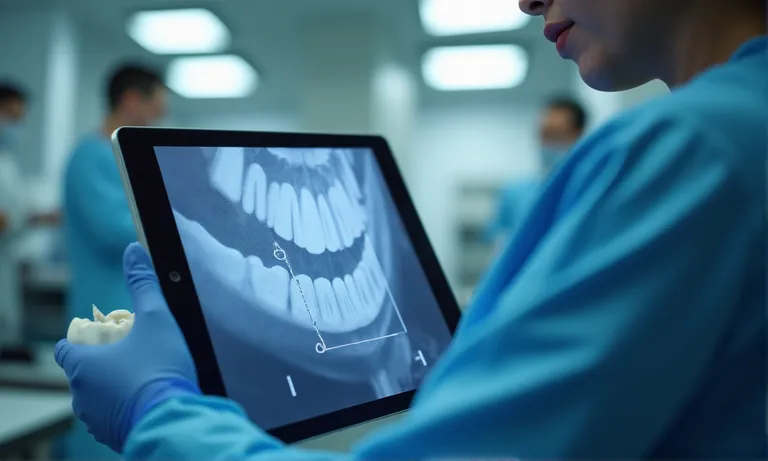
digital-scan-clear-crown-margin
Benefits of high-resolution STL scans in margin visibility
Margin clarity depends on two factors: capture resolution and tissue displacement. Modern intraoral scanners generate STL files with micron-level detail, showing crisp margin lines even in subgingival areas.
Compared to silicone impressions that may lose margin fidelity due to material flow or tearing, a high-resolution digital scan allows both clinicians and lab technicians to zoom, rotate, and assess the margin line from multiple angles. This eliminates guesswork and reduces the risk of seating errors caused by over- or under-trimmed margins.
We’ve received STL files from clients using Medit i700 and 3Shape TRIOS, where even complex molar preps presented clear margins in the digital view—something rarely achievable in analog.
Real-time margin evaluation before submission
Digital systems let clinicians verify prep quality before sending the file to the lab. Here’s a typical in-clinic workflow we’ve seen succeed:
- After scanning, clinicians zoom in on the finish line to check clarity and completeness.
- If the margin is not fully visible, soft tissue can be retracted and the scan updated instantly.
- Some scanners offer auto-highlight functions that alert operators to potential scan errors.
- Clinicians can annotate areas of concern before submission, helping labs avoid misinterpretation.
By verifying before submission, the need for lab callbacks or margin estimations is eliminated. The first version is usually the final version.
Lab-side verification and feedback on scan quality
Labs receiving digital impressions gain powerful tools for proactive quality control. Our digital team follows this three-step verification:
- Check margin visibility at 10x zoom before design
- Compare occlusion capture across both arches for full case context
- Flag any scan gaps or overlaps and notify clinic within 12 hours
This margin-focused QC layer helps prevent errors before they reach production. In one case, we flagged a scan with soft tissue covering the distal margin of tooth #15—our feedback allowed the clinic to rescan within 24 hours, avoiding what would have been a costly chairside remake.
Digital impressions don’t just “look better”—they enable smarter decisions, faster iterations, and cleaner handoffs between clinic and lab. For clinics aiming to reduce ambiguity and improve first-pass success, investing in scan quality and collaborative review is a direct path to better outcomes
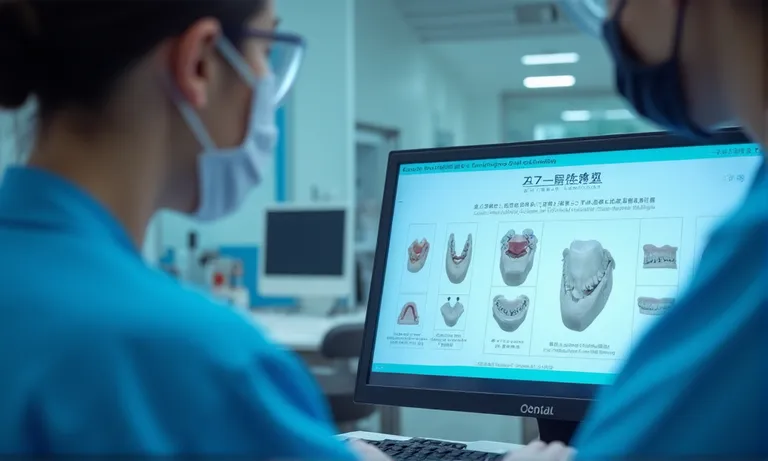
How Does CAD Design Enable Consistent and Repeatable Crown and Bridge Quality?
Computer-aided design (CAD) tools bring repeatability and structure to what used to be highly manual and subjective crown design processes. By using digital libraries, preset parameters, and automated checks, labs can reduce design variability across technicians, cases, and time—leading to better clinical outcomes and fewer surprises at seating.
We’ve worked with multi-location clinics who switched to CAD-driven workflows and saw a measurable drop in contact-point inconsistencies. The key wasn’t just software—it was how CAD helped standardize decisions that used to depend entirely on individual interpretation.
dental-cad-design-consistent-workflow
Using design templates and digital parameter libraries
Standardization begins with a consistent foundation. Most modern CAD platforms now allow labs to apply predefined design parameters for specific case types. Key elements include:
- Cement space: Automatically calibrated based on material type and crown location
- Margin line thickness: Standardized to ensure clean emergence profiles
- Occlusal clearance: Set per arch and opposing anatomy to avoid guesswork
- Contact pressure: Defined within tolerance to minimize seating resistance
We maintain internal libraries across materials (e.max, zirconia, PFM) that apply default values per client preference. For example, one client prefers slightly tighter proximal contacts on anterior zirconia crowns, and our CAD designers automatically apply that rule across all relevant designs.
CAD automation of contact points and occlusion geometry
Many labs rely on technician touch to adjust occlusion and proximal contact. With CAD, these adjustments follow a defined, stepwise logic:
- Load scan and select crown prep
- Apply digital tooth model based on selected template
- Activate auto-contact calibration—software calculates and renders interproximal pressure
- Simulate occlusion using antagonist arch scan
- Flag any interferences and adjust automatically or via guided manual override
- Save version history for future reference and repeatability
This approach eliminates the “feel-based” interpretation of contact pressure, which varies heavily across technicians and even across shifts.
Reducing technician-dependent variability through workflow standardization
CAD does not remove the human element—it makes it more consistent. We’ve seen new technicians trained on 3Shape systems deliver 90%+ first-pass approval rates within weeks, largely due to the built-in design controls.
In one recent case, a client flagged inconsistent contact points on their anterior bridges across two batches. After review, we found the earlier designs came from a now-retired technician using analog workflows. With CAD templates reinstated, the issue was resolved, and remake rates dropped by half in the next production cycle.
CAD also enables multi-tech synchronization—when one designer is on leave or moves teams, their exact design logic remains embedded in the system. That means the clinic doesn’t feel the variability, and we maintain a seamless delivery standard.
Digital design isn’t just faster—it embeds rules, preserves quality, and reduces dependence on memory or habit. For growing clinics and DSOs managing multi-site quality, this foundation of consistency becomes a strategic advantage.
How Does Digital Workflow Help Reduce Remakes and Chairside Adjustments?
Digital workflows reduce remakes and seating adjustments by shifting error detection upstream—allowing fitting issues, margin gaps, and occlusal interference to be identified before production even begins. With simulation tools, traceable version histories, and structured feedback loops, labs and clinics can systematically eliminate avoidable errors and build repeatable success.
For clinics handling dozens of crowns weekly, even a 10% remake rate can result in serious time and patient satisfaction costs. We’ve seen clients cut remake frequency by half within one quarter, simply by closing the loop between scan quality, design, and fitting simulation.
dental-workflow-simulation-remake-check
Simulated fitting and validation before milling
Before any crown is milled, CAD software allows labs to simulate its fit across three key axes: contact tightness, occlusion, and marginal integrity. This prevents most common fitting errors from reaching the chairside. Here’s how we run pre-production validation:
- Apply automatic contact detection across mesial and distal surfaces
- Overlay opposing arch scan and check for occlusal interferences
- Review margin line completeness under magnification
- If contact/occlusion force exceeds tolerances, the software flags hotspots
- Adjustments are made before design is finalized and sent to CAM
- Simulation record is logged in case file for future comparison
In one case involving a full-arch zirconia restoration, this simulation flagged excessive occlusion on #26 that would have required major chairside grinding. We corrected it before milling, saving over 45 minutes of clinical adjustment.
Tracking remake root causes through digital records
Digital workflows make it possible to trace every remake back to its root cause. We maintain a structured remake log with these categories:
- Scan error: margin unclear, incomplete prep, missing antagonist
- Design logic deviation: incorrect parameters, missing cutback
- CAM output issue: spindle drift, calibration offset
- Shipping/handling damage: fracture or contamination post-production
- Rx confusion: prescription incomplete or conflicting with scan
Each case includes screenshots, timestamps, and responsible step owner. This accountability enables targeted improvement—for example, one DSO client adjusted their scanner calibration protocol after margin issues were linked to an outdated firmware version.
Real-time feedback loops to avoid production delays
Traditional workflows often delay error detection until the final delivery. In contrast, digital tools allow for instant lab-clinic communication as soon as a red flag appears.
In our lab, scan issues are flagged within 12 hours. Technicians can annotate files, leave voice notes, or send quick turnaround requests. In one recent case, a scan missing opposing dentition was corrected and re-submitted the same day, preventing a three-day delay.
This responsiveness builds clinical trust. One of our partner clinics noted that “the difference wasn’t just the software—it was how quickly we knew something was off.”
Digital workflows don’t just speed things up—they reduce the number of things that can go wrong. For any clinic managing high volumes or complex restorations, this proactive quality approach transforms consistency into competitive advantage.
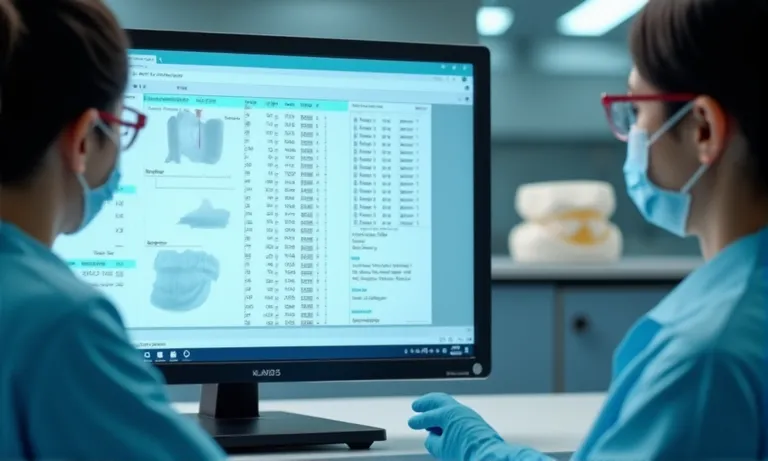
What Submission Protocols Ensure Digital Precision Across the Workflow?
Ensuring that digital workflows remain precise throughout the process begins with standardized submission protocols. By adhering to clear guidelines for STL file formats, bite registrations, and case labeling, both clinics and labs reduce the chances of errors and miscommunication. These protocols allow for smoother transitions between the digital and physical steps, ensuring the design, milling, and final fit are aligned with the clinic’s expectations.
From our experience, having a structured and repeatable protocol for each case—whether it’s a single crown or a full-arch restoration—provides both the clinic and the lab with a reference point for quality. Without these clear protocols, a breakdown at any stage can lead to delays or remakes.
digital-submission-protocol
Standardized STL file submission for crown & bridge
One of the most crucial elements in digital precision is ensuring that STL files are submitted in a consistent, error-free format. This begins with:
- Correct resolution: Minimum requirements are typically 20 microns to ensure margin accuracy
- Proper orientation: Files should be oriented to minimize distortion during milling
- File type consistency: STL files must be uncompressed to avoid data loss
- Clean edges and surfaces: Files with incomplete data or non-closed mesh can cause significant fitting issues
When receiving STL files, our lab runs automated scripts that check for any issues before design begins. In cases where we notice file inconsistencies, the clinic is alerted to rescan or provide an updated file. This proactive approach minimizes lab time spent troubleshooting poor-quality scans.
Bite registration, scan body validation, and jaw alignment
For accurate fit, bite registration and jaw alignment are critical for both single crowns and multi-unit cases. Ensuring that the digital bite registration is captured in a stable, reproducible way helps maintain the occlusion plan. Here’s how we ensure alignment:
- Ensure that the scan body used for implant cases is clearly visible and seated in place
- Align the upper and lower jaw scans to ensure occlusion is correct
- Check for any discrepancies in the interarch relationships during the submission review
- Ask the clinic to provide occlusion photos if the scan shows unusual contact or misalignment
- Confirm that all bites are recorded with the patient in a relaxed, natural position
By performing this validation step before moving into the milling phase, we drastically reduce misalignment issues during the final fitting. A consistent protocol ensures that the patient’s occlusion is optimized before production starts.
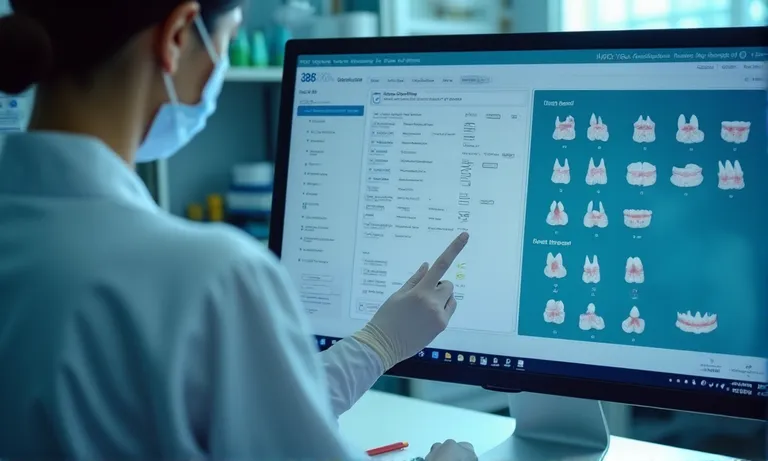
Case labeling and prescription completeness checklist
A missing or unclear prescription is one of the most frequent sources of confusion in the digital workflow. Having a detailed case label and checklist ensures that all necessary information accompanies the digital submission. This includes:
| Information Required | Description |
|---|---|
| Patient details | Full name, age, and clinical history |
| Prescription details | Material choice, shade, and special instructions |
| Scan quality check | Clinic to confirm scan quality with timestamp |
| Expected delivery date | Essential for scheduling production timeline |
We find that including a comprehensive prescription checklist at the beginning of the case workflow drastically reduces errors. One DSO client reported a 20% improvement in on-time delivery after implementing this protocol.
Clear case submission protocols not only ensure digital precision but also improve overall workflow efficiency. Clinics and labs working from the same page can avoid common errors, ensuring that patients get their restorations faster and with fewer adjustments.
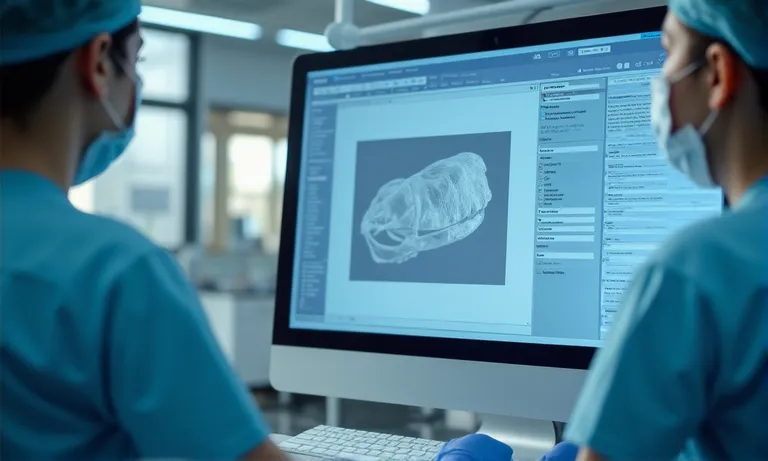
What Built-in Quality Controls Exist Within Digital Lab Processes?
Digital dental labs incorporate layered quality control mechanisms throughout the production cycle—from data intake to final delivery. These built-in checks allow labs to track every stage of the case, reduce manual error, and provide consistent outcomes even across high case volumes.
At Raytops, we’ve integrated automated systems that not only flag issues before they reach production but also generate logs that clinics can reference for transparency. This makes digital workflows not just faster, but more verifiable and accountable—attributes that matter especially to procurement teams managing multi-site operations.
digital-lab-quality-control-system
In-lab machine calibration and auto-logging systems
Every digital manufacturing step must be verified to ensure physical outputs match digital designs. Key control points include:
- Milling machine calibration checks: Automated before each production cycle to detect any axis drift
- Material batch logging: QR-coded lots scanned and matched to prescriptions, reducing cross-contamination risk
- Bur usage tracking: Monitored with wear thresholds to avoid degraded cut precision
- Environmental control: Lab temperature and humidity monitored to ensure ceramic firing consistency
All logs are time-stamped and digitally stored. If a crown doesn’t fit, we can backtrack within minutes to verify whether a machine drift, tool wear, or temperature deviation occurred during production.
File versioning, timestamped approval checkpoints
To manage edits and approvals across multiple technicians or shifts, digital labs rely on structured version control. A typical file versioning flow includes:
- STL received and reviewed by intake technician
- Initial CAD design created and saved as Version A
- QC technician reviews margin, occlusion, contact and annotates changes
- Revised Version B saved with time/date and technician ID
- Final version signed off before sending to CAM queue
- Post-delivery, case can be reloaded with full version history
This system ensures that even if a team member is unavailable, any technician can trace the full decision path of a case—reducing confusion and speeding up issue resolution.
Post-production digital verification with delivery reports
After milling and before packaging, each restoration undergoes digital verification to ensure it meets design specifications. This includes:
- Comparing the milled product to the final CAD file using overlay tools
- Confirming internal fit via virtual insertion tools
- Running contact/occlusion simulation on the milled scan
- Including digital screenshots and pass/fail stamps in the delivery PDF
Clinics receiving these reports can quickly cross-check restoration parameters if issues arise. One of our clients recently praised how a delivery report helped them identify that a fitting issue originated from an intraoral scan misalignment—not lab milling.
Digital lab quality control doesn’t just happen at the end—it’s embedded throughout the workflow. For clinics that value predictability, this traceability translates to lower remake rates, faster adjustments, and more confidence in every delivery.
How Do Digital Collaboration Tools Enhance Lab-Clinic Communication and Final Outcomes?
Digital collaboration platforms bridge the traditional communication gap between clinics and labs—enabling real-time updates, annotated feedback, and faster decision cycles. When a case file is no longer just a box of impressions and a handwritten Rx but a dynamic, traceable digital record, errors are reduced and trust improves on both sides.
We’ve worked with clients in the U.S., Germany, and Australia who consistently tell us: “It’s not just the scan quality—it’s how fast and clearly we get responses from your team.” That clarity is powered by digital infrastructure, not just human effort.
dental-collaboration-digital-platform
Shared platforms for case status and real-time updates
Instead of back-and-forth emails or missed calls, shared cloud-based dashboards now allow clinics to check case progress at a glance. We commonly support workflows where:
- Case statuses are updated in real time, from scan received to milling complete
- Clinics can upload additional photos or notes directly into the case record
- Estimated delivery dates are dynamically updated based on production status
- Technicians can tag specific case IDs with alerts or follow-ups
This visibility reduces uncertainty, and for group practices or DSOs, it provides a centralized view of lab performance across locations.
Annotated 3D file feedback and revision tracking
Communicating adjustments via text or phone can often lead to ambiguity. 3D file annotations provide visual clarity that speeds up alignment.
In one recent case, a dentist requested tighter proximal contact on tooth #12. Instead of calling, they simply used the platform’s annotation tool to highlight the area and add a comment. Our technician responded with a screenshot and confirmed the design update within the same afternoon. The crown was delivered on time, first pass.
This visual loop ensures everyone is working from the same model—and the history is saved for accountability.
Reduced turnaround due to synchronized communication flow
Digital collaboration shortens turnaround times not just by moving files faster, but by removing guesswork. A typical case cycle looks like this:
- Clinic uploads STL scan and case details via platform
- Lab reviews and confirms margin clarity within 12 hours
- If any issue arises, annotation + rescan request is sent same day
- Final design approved by lab within 24–36 hours
- Milling and delivery scheduled without delay
In traditional workflows, any one of these steps might be delayed by phone tag or shipping lag. Digitization turns collaboration into a synchronized system—especially valuable for time-sensitive cases like implant temporaries or esthetic zone restorations.
Digital tools are more than conveniences—they are enablers of faster, clearer, and more reliable clinical-lab relationships. When paired with responsive human teams, they form the foundation of scalable, repeatable success across practices.
Conclusion
Digital workflows in crown and bridge production do more than enhance efficiency—they systematically improve precision, consistency, and turnaround reliability. By embedding quality controls, real-time feedback, and collaborative platforms into every stage, labs and clinics can achieve better first-pass success and reduce costly remakes.
For dental practices seeking dependable outcomes at scale, partnering with an overseas dental lab that understands both the technology and clinical priorities makes all the difference. When experience, systems, and responsiveness align, results become repeatable—and trust becomes measurable.