3D printing has become a pivotal force in modern crown and bridge manufacturing—boosting speed, precision, and workflow reliability across the board. For dental clinics, DSOs, and labs evaluating production partners, understanding the practical role of 3D printing is critical to assessing compatibility, efficiency, and long-term value.
This article breaks down how 3D printing is integrated across the crown and bridge production process, including:
- Which manufacturing steps benefit most from 3D printing
- Materials and printer types used for temporaries, dies, and casting patterns
- Operational advantages such as reduced turnaround times and fewer remakes
- Digital file formats and scan readiness required for seamless integration
- Common use cases like printed provisionals and diagnostic mock-ups
- Key questions to evaluate a lab’s true 3D printing capabilities
By connecting these elements with real-world outsourcing scenarios, procurement teams can make better-informed choices—partnering with labs that not only use 3D printing, but use it well.
What Manufacturing Steps in Crown and Bridge Production Use 3D Printing?
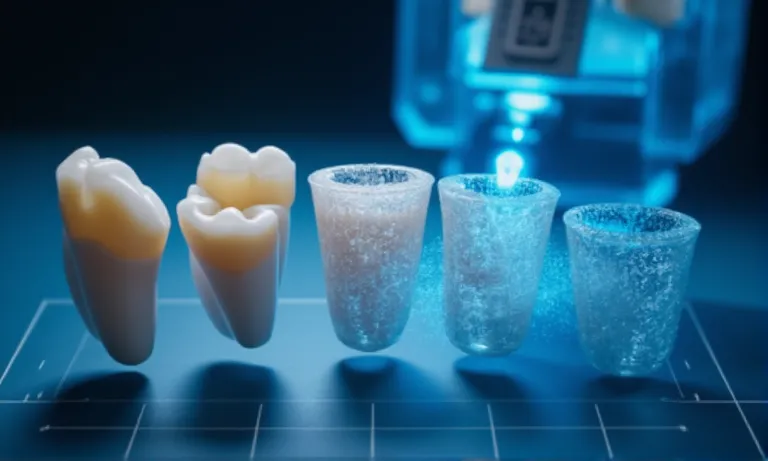
3D printing is increasingly integrated into multiple stages of crown and bridge production—from initial diagnostic models to final wax patterns for casting. Its role varies depending on whether production is handled in-house at the clinic or outsourced to a lab, but the key advantage is the ability to create custom-fit, reproducible components quickly and with high precision.
At Raytops, we support both clinic-based and lab-integrated workflows, often using printing in pattern generation, die model fabrication, and provisional restoration manufacturing.
What crown and bridge components can be produced with 3D printing?
Today’s dental labs use 3D printing to create:
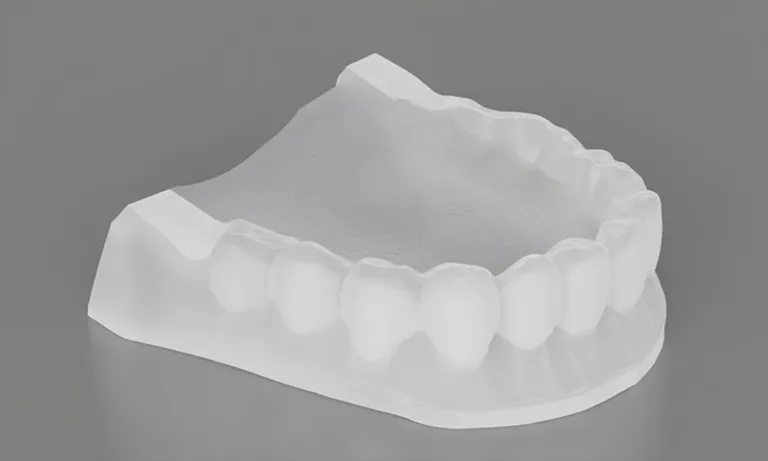
- Printed diagnostic models: For evaluating fit and contact before final crown production
- Working dies and removable dies: Essential for analog finishing and QC checks
- Wax/resin patterns: Used in lost-wax casting for PFM or full-cast restorations
- Temporary crowns and bridges: Directly printed using biocompatible resins
- Try-in or prototype shells: For esthetic previews and patient communication
- Surgical guides (for implant-supported crown cases): Printed with high-accuracy clear resins
These components allow for more streamlined communication and prototyping, especially in multi-party workflows.
How does 3D printing replace or complement traditional methods?
Instead of manually pouring stone models or sculpting wax, labs now produce digital-ready equivalents using SLA or DLP printers. This replaces labor-intensive steps like:
- Manual wax carving for casting patterns
- Stone die sectioning and pinning
- Vacuum-forming diagnostic shells
However, 3D printing often complements rather than fully replaces traditional steps. For example, printed wax patterns still require investment and burnout in conventional casting ovens.
The combination of digital design + printed intermediate components + conventional finishing gives labs both speed and control—particularly for complex multi-unit cases.
How is 3D printing used differently in in-house vs. outsourced workflows?
- In-house (clinic)
- Focus on printed temporaries, models, or diagnostic shells
- Rapid chairside feedback, used mainly for same-day or prototype cases
- Limited printer resolution and fewer material options
- Outsourced (lab)
- High-resolution SLA or DLP printers for final patterns and dies
- Broad material compatibility (castable wax, rigid model resins, etc.)
- Integration with CAM workflows for precision milling and finalization
Labs like Raytops often receive intraoral scans, process the design in CAD, print necessary components, and complete final restorations—all within a 3–5 day window.
What Types of 3D Printers and Materials Are Used for Dental Crowns and Bridges?
Dental labs typically use SLA, DLP, and LCD printers to produce various crown and bridge components—each matched with specific materials based on case type. The right combination of printer and resin affects not only speed and cost, but also strength, esthetics, and precision of the final result.
At Raytops, we operate both SLA and DLP systems depending on whether the goal is castable precision, model durability, or temporary restoration esthetics.
Which printing technologies (SLA, DLP, LCD) are commonly applied?
- SLA (Stereolithography)
- Excellent detail resolution, ideal for casting patterns and dies
- Slower print speed but smoother surfaces
- Common in high-precision cases, e.g. full-cast crowns
- DLP (Digital Light Processing)
- High speed and batch-printing efficiency
- Slightly lower surface resolution than SLA, but good for models and temporaries
- Popular for labs processing high daily volumes
- LCD (Masked SLA)
- Cost-effective entry-level option
- Lower consistency in large batches
- More common in chairside or in-house clinic setups
Each technology has trade-offs. Labs typically select based on volume, use case, and desired post-processing workflow.
What materials are suitable for crown temporaries, dies, or casting patterns?
| Use Case | Common Resin Type | Key Properties |
|---|---|---|
| Temporary crowns | Biocompatible Class II resin | Esthetic, polishable, intraoral safe |
| Diagnostic models | Rigid model resin | High dimensional stability |
| Wax-up patterns | Castable resin | Burns out cleanly, precise margin lines |
| Dies | High-temp gray resin | Accuracy under handling, no chipping |
At Raytops, we select resins based on both case requirements and downstream finishing compatibility. For example, a diagnostic wax-up intended for press ceramic layering may use different resin than one used for simple visualization.
How do printer-material combinations impact strength, accuracy, and esthetics?
Even the best printers perform poorly with mismatched materials. For example:
- A biocompatible resin printed on an LCD machine may show marginal fit variation across batches due to uneven UV exposure.
- A castable resin run on a high-speed DLP printer may have surface tension irregularities if the cure speed isn’t properly calibrated.
Labs that understand these interactions optimize not just for “print speed,” but for the combined performance—dimensional tolerance, shade behavior, surface polishability, and burnout consistency.
That’s why we recommend clients not only ask what machine a lab uses—but also what materials, settings, and validation protocols are in place.
How Does 3D Printing Help Improve Accuracy and Reduce Remakes?
3D printing enhances accuracy in crown and bridge production by minimizing manual variation and enabling consistent outputs—resulting in fewer adjustments, lower remake rates, and tighter marginal fits.
Labs that integrate calibrated printing protocols report significant quality improvements, particularly in the modeling and casting phases.
At Raytops, we saw a 12% reduction in chairside adjustments after shifting our wax-up and die production to high-resolution DLP workflows.
How does 3D printing reduce manual errors and inconsistencies?
Traditional methods often involve multiple manual stages: pouring stone, trimming dies, wax carving—all of which introduce potential variation. 3D printing replaces these with:
- Digitally defined design boundaries
- Automated layering with sub-50μm accuracy
- Repeatable, machine-driven consistency
This means the same scan, printed twice, yields nearly identical results—something nearly impossible with analog workflows. Errors from model warping, pinning misalignment, or wax pullback are virtually eliminated.
What level of precision can be achieved in printed dies and wax-ups?
Depending on the printer-material setup, labs can consistently achieve:
- Die model accuracy: ±35–50 microns with rigid model resins
- Margin clarity: crisp edge definition in 3D-printed wax-ups
- Consistent contact point reproduction: improved interproximal fit
- Minimal occlusal adjustments: contact patterns within ±0.1 mm tolerance
These numbers are within the range needed for final restorations to seat passively and require minimal chairside refinement.
At Raytops, we use printed models as verification checkpoints before ceramic layering—preventing compounding errors late in the workflow.
Are labs seeing lower adjustment or remake rates with 3D printing?
Yes—and it’s measurable. Labs that adopt digital + 3D-printed workflows consistently report:
- Fewer chairside adjustments (10–30% reduction)
- Lower internal remake rates (5–15% drop across 6 months)
- Improved margin integrity—especially in multi-unit or implant-supported cases
We supported one DSO client in switching from stone dies to printed models, and their remake rate on posterior zirconia crowns dropped from 7.8% to 4.2% within 90 days—just by standardizing their scan and print parameters.
These results are not just technical—they translate to saved appointments, fewer patient complaints, and better clinician trust.
How Can 3D Printing Accelerate Crown and Bridge Turnaround Time?
3D printing shortens production timelines by eliminating physical steps, reducing technician labor, and enabling same-day part fabrication—especially for diagnostic models, provisionals, and casting patterns.
For labs and clinics managing multiple cases per week, shaving off even 1–2 days per case adds up quickly.
At Raytops, we routinely use 3D printing to compress workflow stages and deliver faster, without sacrificing accuracy or QC.
What production steps are faster with 3D printing?
Key stages where 3D printing accelerates turnaround include:
- Model creation
- No need for stone pouring or setting time
- Ready within 1–2 hours after scan approval
- Wax-up pattern production
- Printed directly from CAD with no manual carving
- Reduces back-and-forth and pre-casting preparation
- Temporaries and trial restorations
- Printed with biocompatible resin and finished within a single shift
- Useful for provisionalization or esthetic mock-ups
These efficiencies allow labs to reallocate technician hours to critical cases, while machines handle repeatable mid-stage production tasks.
How does 3D printing support faster feedback or trial fitting?
Digital + 3D workflows enable quicker feedback loops between lab and clinic. For example:
- Printed diagnostic shells can be delivered in 1–2 days, allowing clinicians to test fit or esthetics before finalizing design.
- Printed dies can be used to validate marginal fit or contact points early in the workflow.
- Iteration cycles become faster since design files don’t need to be physically shipped or poured—only reprinted.
This real-time feedback is especially valuable in high-aesthetic cases or where patient schedules are tight.
We’ve helped clinics implement 48-hour diagnostic loops using only STL files, a cloud-based viewer, and a printed prototype.
Can 3D printing help meet same-day or rush order needs?
In select scenarios, yes. Labs that pre-schedule printer time or have designated same-day protocols can produce:
- Single-unit temporaries or provisionals in 3–6 hours
- Surgical guides or esthetic shells overnight
- Model-free restorations for intraoral use when combined with in-clinic milling
Raytops offers pre-approved “expedited slots” for recurring DSO clients. In one instance, we supported a US-based group with a 72-hour zirconia crown cycle—including scan, design, printing of model, and CAM production—coordinated entirely across time zones.
These workflows are most effective when both clinic and lab align their systems, file compatibility, and approval cut-offs.
How Does 3D Printing Fit into a Fully Digital Crown and Bridge Workflow?
3D printing acts as a bridge between digital scanning and physical restoration, converting intraoral data into precise printed components within hours.
Its success depends on smooth integration across scanning systems, CAD formats, and lab printing protocols.
How are intraoral scans prepared for printing?
To ensure accuracy and efficiency, labs follow these steps:
- Scan verification
- Check for margin clarity, full arch capture, and opposing anatomy
- Confirm occlusion records are present and aligned
- CAD preprocessing
- Trim and orient the scan data
- Export printable segments (e.g., dies, arches, provisionals)
- Print setup
- Nest parts using build software (e.g., Netfabb, PreForm)
- Set layer thickness and support strategy
- Queue to DLP/SLA/LCD printers based on material use
This protocol minimizes design lag and prevents repeated approvals caused by poor file input.
What file types and CAD formats are typically used?
A successful scan-to-print workflow depends on file compatibility. Common formats include:
- STL – Most widely used, open-source and compatible with most CAD/CAM platforms
- OBJ – Used when color or texture is required (e.g., gingival modeling)
- PLY – Supports color and high-density point cloud, especially in diagnostic planning
- 3MF – Emerging format offering better metadata handling
Labs often convert intraoral scans into printable STL shells for diagnostic models and dies. The cleaner the input, the more accurate the printed component.
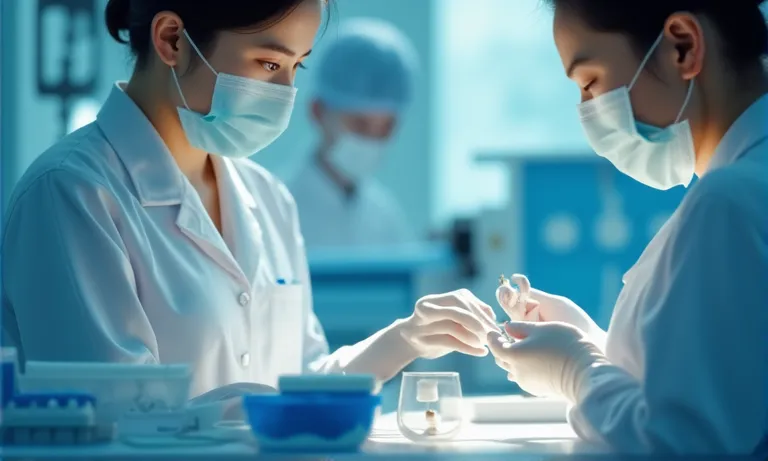
What role does the lab play in optimizing scan-to-print transitions?
Labs act as digital translators. While clinics focus on capturing clean intraoral scans, labs ensure:
- Correct segmentation – Identifying margins, implant scan bodies, and prep orientation
- System matching – Mapping scans from iTero, Medit, or Trios to appropriate printer profiles
- Error catching – Flagging common issues (e.g., open meshes, missing bite) early
At Raytops, we’ve developed intake checklists for common IOS systems and train staff to detect non-printable files within minutes. One DSO group in the UK reduced their preprint rejection rate by 42% after aligning their scanning protocol with our file acceptance guide.
What Are the Most Common Applications of 3D Printing in Temporary and Diagnostic Restorations?
3D printing enables fast, affordable, and accurate fabrication of provisional restorations and diagnostic models, helping both clinicians and patients make informed decisions before finalizing crown and bridge cases.
From trial fittings to aesthetic previews, its flexibility offers a valuable planning and communication layer in restorative workflows.
How are 3D-printed temporaries used in crown and bridge cases?
Printed provisionals are increasingly used as short-term restorations during treatment planning or between preparation and final cementation. Labs print:
- Single-unit provisional crowns or bridges
- Full-arch mock-ups for aesthetic preview
- Long-span temporary bridges for implant sequencing
Raytops supports several clients who rely on printed temps for cosmetic smile trials. In one case, a Florida DSO requested 8-unit anterior provisionals with a turnaround of 36 hours. Using biocompatible resin and pre-calibrated printer settings, we delivered functional and esthetic temps on time—helping the clinician secure patient approval before investing in layered zirconia.
When are prototype models printed for evaluation or communication?
Common scenarios include:
- Diagnostic wax-ups – to visualize form and occlusion before final prep
- Surgical planning models – especially in complex implant or sinus lift cases
- Pre-op vs. post-op comparison models – for education and insurance documentation
- Color mock-ups or trial esthetics – to validate shade selection or gingival contouring
These models are especially valuable in multi-provider workflows or aesthetic-driven cases.
How do labs ensure strength and esthetics in printed provisionals?
Labs use rigid, biocompatible resins (e.g., Class IIa) designed for short-term intraoral use. Post-print processes include:
- UV curing for full polymerization
- Manual finishing of margins and occlusal areas
- Tinting or staining to mimic natural shades
When supported by high-resolution printers (e.g., DLP 385 nm, 50μm layer), results can closely mimic the appearance of milled PMMA—while being faster and more flexible to iterate.
How Should You Evaluate a Dental Lab’s 3D Printing Capabilities?
Not all labs that advertise 3D printing are equally prepared for consistent digital crown and bridge production.
For reliable output, buyers should assess printer setup, technician workflows, and the lab’s ability to integrate with your digital inputs.
What questions reveal if a lab is truly 3D-printing-ready?
When evaluating a partner, ask:
- Can you show recent 3D-printed cases used for temporary crowns or diagnostic wax-ups?
- Do you support multiple intraoral scan systems (iTero, Trios, Medit, etc.)?
- How do you handle design approvals and reprint workflows for printed temps?
- Is your print process integrated with post-processing and finishing protocols?
These questions uncover whether printing is just “marketing language” or a true operational process.
Which certifications, equipment, or case samples indicate maturity?
Look for:
- Printer brands: Use of DLP/SLA printers from known dental manufacturers (e.g., Asiga, SprintRay, NextDent)
- Materials: Biocompatible Class IIa resins for intraoral use, aesthetic resin for mock-ups
- Certifications: ISO 13485 or CE marking on printer/material combo
- Sample library: Lab should be able to share printed crown shells, wax-ups, or model comparisons with finish photos
At Raytops, we’ve had clients request side-by-side photos of printed vs. milled provisionals to evaluate surface fidelity and margin precision—something we proactively prepare during onboarding.
How can labs demonstrate integration with digital inputs from clients?
Labs should align file intake and printer nesting to avoid miscommunication. This means:
- Accepting STL/PLY/3MF files with embedded metadata
- Offering case-specific nesting templates or part maps
- Returning same-day feedback on scan quality or printability
For example, when working with a Canadian DSO group, our team built a print-specific intake checklist tailored to their Trios scans, reducing STL rejections by 40% within the first month.
Conclusion
3D printing has revolutionized crown and bridge production by enabling faster, more accurate, and more flexible workflows. From diagnostic models to final restorations, it improves precision, reduces manual errors, and enhances turnaround times. Labs that successfully integrate 3D printing into their processes not only streamline production but also ensure better collaboration with clients—leading to fewer adjustments and higher satisfaction.
As an overseas dental lab, Raytops focuses on providing seamless integration of 3D printing into our workflow, offering clients consistent results and faster delivery. By understanding and optimizing the capabilities of 3D printing, both clinics and labs can elevate the quality and efficiency of restorative dental care.