Ensuring consistent quality in digital crown and bridge workflows requires more than digital tools—it demands disciplined systems across every production stage. Leading dental labs implement structured QA practices, including:
- STL file validation for resolution, surface detail, and scan completeness
- Standardized CAD/CAM parameters to minimize technician variability
- AI-assisted checks for design anomalies and milling toolpath errors
- Version control protocols and clear intake SOPs for every case
- Remake tracking dashboards to identify root causes and reduce rework
- Transparent QA metrics buyers can evaluate—such as remake rates, SLA terms, and technician checklist compliance
Labs that embed these controls into their workflow deliver more reliable results, fewer remakes, and stronger long-term trust with clinical partners.
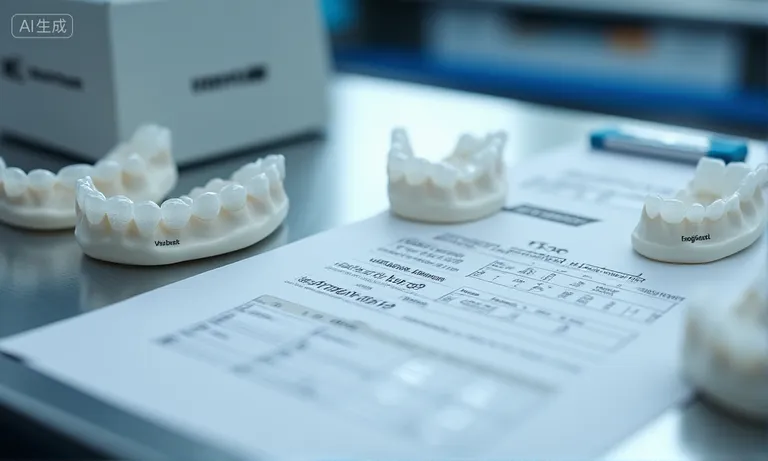
Why Consistency Is Essential in Digital Crown and Bridge Production
Digital tools have revolutionized crown and bridge workflows—but consistency, not just digitization, is what determines long-term success. Labs that deliver predictable results across cases and timeframes help clinics build patient trust, reduce remakes, and maintain operational efficiency.

dental-lab-consistent-digital-crown-output
How inconsistency affects fit accuracy, patient satisfaction, and remake cost
Inconsistent output—even in digital workflows—can create cascading problems. A crown that looks perfect on screen might arrive 150 microns too high, triggering occlusal adjustments or discomfort. A margin that deviates by half a millimeter could compromise long-term restoration success.
We’ve worked with DSOs that reported 5–7% remake rates solely due to minor misfits. Each remake isn’t just a lab cost—it disrupts the clinic schedule, frustrates patients, and eats into chair time. Over time, inconsistency becomes a reputation risk for both the lab and the buyer.
Why digital workflows reduce—but do not eliminate—variability risks
- Digital scans remove human impressions—but still depend on scanning technique and resolution settings
- CAD design follows rules—but margin marking, contact adjustment, and emergence profile setup remain technician-controlled
- CAM manufacturing uses automation—but mill/burn-in calibration, toolpath tolerance, and material wear introduce physical variance
Digital doesn’t mean flawless. It just means the error source shifts—from analog impressions to digital assumptions.
That’s why labs must pair digital tools with internal calibration standards and trained QA checkpoints, not just rely on software automation.
What buyers expect in a consistent, reproducible lab process
Buyers—especially those managing multi-site clinics or DSOs—aren’t just looking for “digital labs.” They’re looking for labs that consistently deliver the same result, under the same input conditions.
This means:
- The same prep type results in the same emergence profile.
- A zirconia crown scanned with TRIOS fits as expected every time.
- Two technicians produce identical contact points using the same template.
When consistency becomes the default, clinics stop micromanaging labs. They stop checking every margin. They begin to trust.
And trust is the currency of long-term lab relationships.
Labs that treat consistency as a deliverable—not just a byproduct—are the ones that become strategic partners.
What Quality Control Mechanisms Are Built Into the Digital Workflow?
A truly digital dental lab isn’t just scanning and designing—it’s building in quality control at every stage of the workflow. From STL validation to AI-driven design checks, modern labs must ensure accuracy before problems reach the chairside. Without embedded QA steps, digital tools only speed up the error, not prevent it.

digital-dental-lab-quality-control-checkpoints
STL integrity check: resolution validation, edge trimming, error detection
Labs typically start digital QA by inspecting the incoming scan files:
- Mesh resolution check: Detects under-sampled or overly dense STL files that might hide margin detail or slow design processing.
- Edge trimming: Removes excess data (e.g., cheek, tongue) to clarify the preparation zone.
- Integrity scan: Flags warped meshes, disconnected triangles, or overlapping surfaces—common causes of fitting errors.
Labs that skip this step risk building on flawed inputs. Even high-end scanners can produce distorted files if the operator moves too quickly or skips calibration.
CAD checkpoints: margin control, contact thickness, occlusal clearance settings
Before design approval, our CAD designers follow a mandatory checklist:
- Margin visibility: Are margins clearly defined? If not, we pause the case and request clarification.
- Contact area control: Contact zones are checked against client presets (e.g., 120μ for molars, 80μ for anteriors).
- Occlusion calibration: Interocclusal space and opposing arch contacts are simulated and reviewed using bite scan overlay.
Any deviation outside preset thresholds triggers internal review. This ensures that when the file goes to CAM, it’s not “just okay”—it’s precise.
CAM calibration: toolpath simulation, mill/burn-in self-checks, material tolerance control
Even the best CAD file can fail in production if CAM isn’t tuned.
Each milling or sintering unit runs:
- Toolpath simulation: Checks for collisions, overcuts, and surface loss.
- Burn-in file validation: Daily self-checks ensure that tool alignment, wear, and shrinkage tolerances stay within spec.
- Material tolerance control: Zirconia shrink factor, PMMA margin stability, and wax wear tolerances are preloaded into CAM parameters.
Without CAM QA, good designs become bad restorations.
AI-assisted QA: automated design flagging, pattern recognition for error prediction
One of our clients in Florida submitted a batch of 10 posterior crowns scanned with Medit. The crowns kept returning with tight mesial contacts—even though the digital contacts looked ideal.
Using our internal AI QA system, we ran the design files through historical contact pattern comparison. The algorithm flagged a consistent discrepancy between this scanner + export mode and our contact offset model.
We adjusted the software parameter for this specific scanner preset by 40μ—and all subsequent crowns seated perfectly.
The client told us:
“It’s like you knew our scanner better than we did.”
AI doesn’t replace judgment—but it does help catch invisible patterns before they repeat.
Labs that use AI to supplement QA—not automate blindly—build resilience into their workflows.
How Do Labs Use Standardized Parameters to Maintain Design Consistency?
Standardized design parameters are the backbone of consistency in digital crown and bridge production. Without fixed presets for margin depth, contact clearance, and occlusal schemes, even the most experienced technician may produce variable results. Labs that lock and align these parameters across teams reduce variance—and ensure that every case meets the same quality benchmark.
dental-lab-parameter-preset-selection-crown-design
Library presets for tooth morphology, emergence profiles, occlusion schemes
Labs typically rely on curated design libraries to guide consistent crown outcomes. These include:
- Tooth morphology presets
Based on anatomical templates (e.g., semi-anatomic vs full-anatomic) that control overall shape and cusp angles. - Emergence profile standards
Ensures proper gingival transition zones, especially important for anterior esthetics or implant cases. - Occlusion schemes
Labs preset articulation rules (e.g., canine guidance vs group function) and adjust for scanner-specific bite offsets.
These presets provide a starting point that reduces guesswork—and ensure that Technician A and Technician B using the same template will output near-identical contours.
Design parameter locking across teams and technicians
A growing group practice in Germany had a recurring issue: the same case type—zirconia posterior crown on molar #36—looked different depending on who at the lab designed it. Despite submitting identical scans and preferences, they experienced inconsistent emergence profiles and contact areas.
We reviewed their file history and found that three designers were using slightly different margin depths and occlusion presets. Some were even customizing per-case contact thickness.
To fix this, we implemented lab-wide locking of core parameters via our CAD templates:
- Margin depth fixed at 0.5mm
- Proximal contact set to 120μ
- Occlusal clearance held at 80μ for posteriors
Once enforced, the group saw remake requests drop by 35% over 6 weeks—and the clinic reported they stopped needing to “double check” each case.
One of their leads commented:
“You made our lab feel like an extension of our practice, not just a file receiver.”
Standardization doesn’t remove flexibility—it removes unnecessary variation.
Custom presets for specific clinics or DSOs via case type templates
| Preset Type | Typical Use | Application Example |
|---|---|---|
| Clinic-specific morphology | Long-term partners | DSO A prefers flatter cusps to avoid hyperocclusion in older patients |
| Material-based occlusion | Per restoration type | Zirconia anterior uses softer centric stops vs PMMA provisionals |
| Scanner-adjusted contact | Based on export quirks | Medit scans calibrated at +30μ for proximal fit alignment |
| Margin strategy by prep type | Uniform emergence | Knife-edge vs chamfer margins affect default profile depth |
Well-managed labs don’t force every case into one template. Instead, they map each clinic’s preferences into scalable presets, applied by name or case tag.
This allows design teams to work fast, without losing consistency.
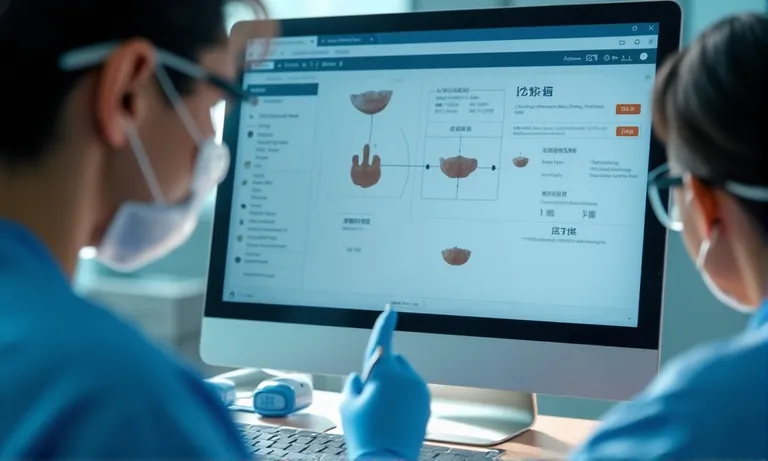
What Role Does Documentation Play in Supporting Reproducible Results?
Consistent output in digital crown and bridge production isn’t just about machines—it’s about the clarity of communication behind every case. Well-documented case details reduce interpretation gaps, while poor documentation leads to misfits, remakes, and delays. Labs that treat documentation as a part of the workflow—not an afterthought—deliver more predictable results.

Image
ALT: dental-case-documentation-digital-workflow
Prompt: A highly realistic, ultra-detailed image of a dental technician reviewing a digital case intake form on a monitor. The screen shows clearly labeled fields for restoration type, margin line, material choice, scan type, and technician notes. Nearby is a STL viewer displaying version comparison. Scene is clean, professional, with soft daylight.
Prescription clarity: case type, margin line, material, restoration type
A complete prescription should include:
- Restoration type: Single crown, bridge, inlay, onlay, etc. influences the design library used.
- Margin line: Clear indication of whether it’s chamfer, shoulder, or knife-edge prep.
- Material: Full-zirconia, layered ceramic, PMMA provisional, each requiring different CAM tolerances.
- Other preferences: Contact strength, pontic shape, or special notes.
Missing details here lead to guesswork. Even if the scan is perfect, an unclear Rx makes consistency impossible.
File naming protocols, intake metadata, technician notes
One of the simplest—but most overlooked—steps in digital consistency is proper file labeling.
When files are named clearly (e.g., “Smith_UR6_Cr_Zirc_v1.stl”) and organized in lab-specific intake folders, technicians know what they’re working with at a glance.
More advanced labs add:
- Metadata tagging: Each case includes notes like “2nd attempt,” “tight contact last time,” or “DSO A molar template.”
- Technician input: Designers annotate margin visibility issues or contact area concerns directly within the platform or PDF report.
This reduces the need for redundant back-and-forth and avoids the trap of “assumed” preferences.
Version control across file revisions, STL updates, remake requests
Reproducibility requires traceability. Labs often deal with multiple versions of the same case due to:
- A second scan with better margin definition
- A file renamed but not versioned
- A design rejected by the clinic and resubmitted
A proper version control flow includes:
- Archived STL v1 → Time-stamped
- Revised STL v2 → Tracked under same case ID
- Design note change → Recorded in intake sheet
- Remake flagged → Linked to original file for QA tracking
When files are mixed, overwritten, or lack version trails, labs lose control—and clients lose trust.
How Do Labs Track and Analyze Remakes to Improve Workflow Stability?
Remake cases aren’t just cost centers—they’re signals. Every remake offers data that, if properly categorized and analyzed, can improve long-term workflow reliability. Labs that consistently track remake patterns, run root cause analysis, and implement systemic improvements often experience fewer disruptions and higher client trust over time.

dental-lab-remake-analysis-dashboard
Remake KPI dashboards: per technician, by error type, per scanner or case category
Top-performing labs monitor remake frequency using key indicators such as:
- By technician: Tracks patterns in CAD design inconsistencies, parameter overrides, or missed checkpoints.
- By scanner brand: Identifies if a certain intraoral scanner model often produces margin misreads or bite registration issues.
- By restoration type: Flags whether certain workflows (e.g., bridges vs crowns) have higher adjustment rates.
- By case metadata: Groups issues based on margin type, material, or case complexity.
Such dashboards help teams avoid subjective blame—and prioritize the right interventions.
Root cause analysis: design error, scan quality, communication gaps
A Canadian DSO sent feedback that six of their recent posterior zirconia crowns required chairside adjustments—primarily for tight interproximal contacts. Initially flagged as scanner-related, the lab’s QA audit revealed a more specific pattern.
Upon comparing the STL files and CAM toolpaths, we found:
- The scans were clean, with margins visible and contact zones intact.
- One technician had adjusted the contact strength up by 30μ due to “tight mesial contact” feedback from a different client—and forgot to reset.
Instead of blaming tools or doctors, we updated our CAD template controls to auto-reset parameters per case type and reminded all technicians via internal check-in.
Since the change, remake reports from that DSO dropped by 42% in eight weeks.
Sometimes, the “fix” is less about better software and more about better memory.
Rework reduction strategies: alert thresholds, parameter adjustment, team retraining
To reduce remake rates, labs deploy structured improvement actions:
- Alert thresholds: Automatic QA flags for high contact values, margin gaps, or occlusal imbalances.
- Parameter templates: Locking designs to avoid technician-specific drift.
- Team retraining: Short internal workshops based on recent QA reports.
- Remake review meetings: Biweekly sessions with case examples, so learnings become shared, not siloed.
- Feedback loops with clinics: Clear forms for adjustment feedback that feed directly into CAD/CAM checks.
Continuous improvement isn’t about never failing—it’s about never repeating.
How Can Buyers Evaluate a Lab’s Quality Consistency Before Working Together?
Before partnering with a dental lab, buyers often ask: “How do I know they’ll deliver consistently?” The answer isn’t just in what the lab claims—it’s in how their systems work. Consistency stems from documented protocols, visible QA processes, and the lab’s ability to explain their methods transparently. If a lab struggles to provide clarity here, it may signal gaps in execution.
dental-lab-quality-review-call-checklist
Ask about: remake rate, technician QA process, digital intake SOPs
When screening a lab, focus your questions on verifiable metrics:
- What’s your current remake rate for zirconia posterior crowns?
- Do technicians follow a formal checklist before case submission?
- How do you ensure parameter consistency across CAD designers?
- What is your protocol for flagging questionable scans or incomplete prescriptions?
A quality-focused lab will answer these without hesitation—and often with data.
Review: case tracking tools, SLA terms, QC documentation samples
Beyond questions, ask for tangible artifacts. Labs that consistently deliver quality usually have a structured digital environment:
- Case tracking: Dashboards or portals that allow buyers to follow progress or flag changes.
- Service Level Agreements (SLAs): Defined turn times, remake limits, response windows.
- QA documentation: Sample intake forms, final checklist templates, or design deviation logs.
One DSO client of ours asked for a “QA package” before onboarding. We provided annotated screenshots of our intake-to-design flow, case-specific remake log, and parameter template. Their comment: “This shows you’ve actually thought it through.” That deal went live in two weeks.
Evaluate: file submission protocols vs QA infrastructure
| Evaluation Criteria | What to Look For |
|---|---|
| File submission SOP | Clear intake folder structure, naming conventions |
| CAD design parameter control | Locked libraries, technician-level audit trail |
| Remake tracking visibility | Historical remake log per client or product type |
| QA escalation process | Defined internal reviewer role, documented actions |
| Feedback integration | Feedback loops with timestamped resolution status |
A lab that shows you this upfront is more likely to deliver predictability later.
Conclusion
Consistent quality in digital crown and bridge workflows isn’t a matter of luck—it’s the result of structured processes, aligned tools, and continuous feedback. Labs that standardize design parameters, track remakes transparently, and document every step offer buyers more than just restorations—they offer predictability.
As an overseas dental lab serving global partners, we’ve learned that consistency builds trust, and trust sustains long-term collaboration. Whether you’re a DSO, clinic, or distributor, evaluating a lab’s operational depth is the first step to ensuring stable, repeatable outcomes.