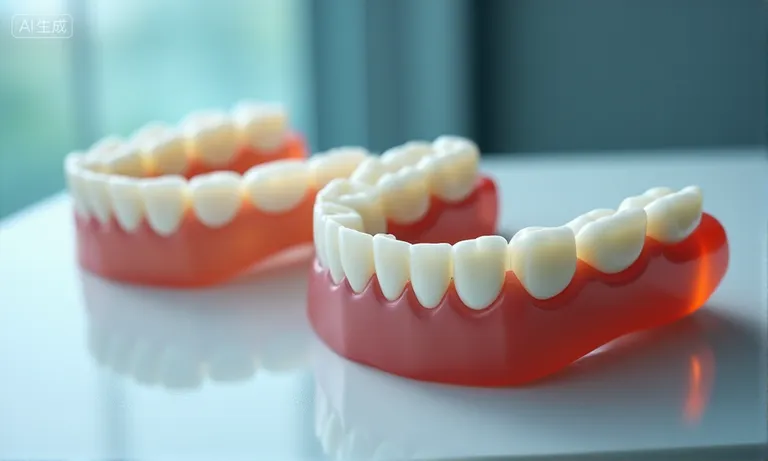
Consistent quality in outsourced removable dentures comes from clear standards, clean digital handoffs, and repeatable controls. Set category-specific KPIs (remake rate, first-pass acceptance, on-time delivery), enforce CAD/CAM rules (STL naming, scan and bite protocols, version control), and lock material choices by indication. Run monthly audits with photos, checklists, and CAPA so issues surface early, not at delivery. Define turnaround tiers, protect cases with rigid packaging, and keep customs documents uniform. Treated as a system—not a project—this approach reduces chairside time, stabilizes fit across batches, and builds a reliable lab partnership.
Key considerations for decision-makers
- Quality metrics: Track remake %, first-pass acceptance, adjustment frequency, and lead-time adherence; review trends monthly and tighten targets by product line.
- Digital workflow: Standardize STL/PLY formats, scan and bite records, submission checklists, and revision approvals to cut handoff errors.
- Materials & technology: Choose acrylic, flexible, or Co-Cr by case goals; use milled bases for definitive fit and printed bases for try-ins or immediates.
- Supplier governance: Align SOPs, SLAs, and change-control; keep a single source of truth for libraries, design notes, and approvals.
- Feedback loops: Use structured try-ins, log chairside adjustments, and close CAPA with owners and due dates.
- Logistics: Map lead-time tiers to case complexity; apply double-box packaging; standardize invoices and part traceability for cross-border flow.
Follow this playbook and procurement teams get predictable outcomes with lower risk, faster approvals, and steadier patient experience—while maintaining a transparent, audit-ready partnership with their outsourcing dental lab.
What Removable-Specific Quality KPIs Prove Consistency?
Consistency in removable work is proven when remake rate, chairside adjustment frequency, fit/retention accuracy, finishing standards, and batch stability all meet pre-set thresholds and trend downward over time. Lock the targets first, then review trends and CAPA monthly to keep variance within control.
How to set remake rate and adjustment frequency for RPDs and complete dentures?
Target remake ≤ 3–5% and chairside adjustment ≤ 15–20% of delivered cases, then tighten by product line after three stable months. Separate metrics for RPD frameworks vs complete dentures, and exclude doctor-initiated design changes from remake tally.
How to define fit accuracy and retention benchmarks for removable cases?
Use try-in or verification indices to target base adaptation gap ≤ 0.5 mm and clasp engagement within planned undercut ±0.01–0.02 in. Define acceptable dislodgement force ranges per attachment system; document jaw relation accuracy with repeatable bite records.
What finishing standards (surface, contour, occlusion contacts) should be audited?
| Dimension | Checkpoint | Acceptance |
|---|---|---|
| Surface polish | Base, borders, intaglio free of scratches | No visible 180–240 grit lines |
| Contour | Anatomical contour preserved | Symmetry within visual QC guide |
| Occlusion | Marked in MIP/adjusted in excursions | Even bilateral contacts; no high points |
How to track batch-to-batch stability across recurring orders?
Group by clinic and product type; compare moving averages per 20–30 cases. Flag drift if any KPI worsens >25% vs last quarter baseline. Investigate by design notes, materials, and operator.
How to request evaluation samples and structured reference checks?
- Request two blinded evaluation samples per category; 2) issue a graded scorecard; 3) run reference checks with two similar clinics; 4) align CAPA triggers and response times; 5) finalize KPIs and review cadence. See ISO 13485 CAPA overview for governance (anchor: ISO 13485 CAPA).
Which trend charts should be reviewed monthly?
| Chart | Purpose | Action |
|---|---|---|
| Remake % by product line | Spot spikes | Root-cause & CAPA |
| Adjustment frequency | Chairside burden | Update design notes |
| Fit/retention control chart | Stability | Recalibrate process |
| CAPA aging & closure rate | Discipline | Escalate overdue items |
Consistent quality becomes predictable when thresholds are explicit, evidence is trended, and CAPA closes the loop. As an outsourcing dental lab partner, Raytops aligns KPI baselines during onboarding and reviews them monthly to keep variance tight while minimizing chairside time.
Digital Workflow & File Requirements for Removable (CAD/CAM)
Consistency starts with clean digital handoffs: fixed STL naming, complete scans and bite records, a standard RPD submission checklist, clear design notes, in-process QC, and strict version control between try-in and final. Lock these rules once, then enforce them on every case to prevent avoidable remakes.
What STL naming, scan protocols, and bite records are mandatory for RPD/complete dentures?
- STL/PLY naming: ClinicID_PatientID_DateYYYYMMDD_CaseType_TryIn/Final_RevX (e.g., DSO23_4187_20250109_RPD_TryIn_Rev1).
- Scans: maxillary, mandibular, border/vestibule capture; palate/rugae for stability; scan bodies when indicated.
- Bite: buccal bite at MIP or CR (flag which), vertical dimension note, midline/occlusal plane photos.
- Formats: STL (mm, binary), optional PLY for color; orientation with occlusal plane parallel to XY. See TRIOS scanning guidelines for capture best practices.
What belongs in the standardized RPD submission checklist (scan, bite, design notes)?
- Patient/clinic identifiers and shade.
- Arch type, Kennedy class, major connector, clasping plan.
- Survey line/undercut values, path of insertion, relief areas.
- Bite record type, try-in vs final intent, requested turnaround tier.
How to standardize design notes (major connector, rest seats, relief, finish lines)?
| Element | Note syntax example | Default if omitted |
|---|---|---|
| Major connector | “Mx: AP strap 8–10 mm, borders 3 mm from gingival margin” | Lingual bar/AP strap per arch width guide |
| Rest seats | “#13 distal 1.5 mm depth, 2.5 mm width” | 1.5 mm depth, rounded internal angles |
| Undercut | “Clasp on #6 at 0.25 mm on MB” | 0.25 mm on planned survey line |
| Relief/finish | “Tori relief 1.0 mm; finish line 0.5 mm stepped” | 0.5–1.0 mm relief where indicated |
Which in-process QC checkpoints cut digital handoff errors for removable?
- File integrity: watertight meshes, no self-intersections, decimation disabled for margins.
- Library control: tooth/library version pinned; clasp parameters match undercut values.
- Thickness rules: base ≥ 2.0 mm at stress areas; Co-Cr elements per tolerance.
- Try-in intent verified before CAM; export units/mm rechecked.
How to manage version control and approvals for try-in vs final?
- Freeze Rev0 from the first complete submission.
- Log deltas (design notes, bite, materials) per revision.
- Obtain written approval at try-in before releasing final.
- Generate a change report comparing RevN to prior (automatic diff screenshots).
- Close with timestamped approval and CAM release ID.
A disciplined digital workflow reduces chairside adjustments and stops defects at the source; as a global dental lab partner, we can host templates and QC gates so every clinic follows the same playbook.
Material & Framework Choices for Predictable Outcomes
Pick materials by the job-to-be-done: acrylic for cost and repairability, flexible for comfort with limits on rebasing, Co-Cr frameworks for precision and longevity, clear rules for implant-supported cases, and milled bases when fit repeatability matters more than print speed. Decide upstream to avoid downstream remakes.
When to choose acrylic removable dentures for durability vs cost?
- Choose heat-cured PMMA when you need predictable repairs, relines, and shade matching across time.
- Prioritize for budget-sensitive complete dentures and cases needing frequent chairside adds.
- Note cross-compatibility with common teeth libraries and polishing protocols.
How do flexible removable dentures behave under daily wear and repairs?
- Great initial comfort and esthetics; limited rebasing and tooth addition compared with PMMA.
- Plan clasp thickness and insertion path carefully; avoid deep undercuts that hinder future adjustments.
- Reserve for interim or esthetic-led partials where future major changes are unlikely.
Why do cobalt-chrome frameworks improve precision and longevity?
Co-Cr frameworks deliver rigid support, stable clasp retention, and thinner connectors without compromising strength. Precision rests and defined undercuts maintain occlusion over time, which reduces repeated clasp adjustments and mid-term fractures compared with bulkier acrylic metal-free designs.
What to align when outsourcing implant-supported removable dentures?
- Confirm attachment system and library
- Fix bar material/finish, clip hardness, and planned maintenance kit.
- Lock scan body brand/codes and torque specs in the design notes; agree on verification index or printed/milled try-in.
When to prefer milled bases over 3D-printed ones for fit accuracy?
- Choose milled PMMA for repeatable intaglio accuracy, low porosity, and polish durability.
- Use printed bases for speed prototypes, immediate dentures, or try-ins; move to milled for the definitive.
- For recurring orders, standardize “final = milled; try-in = printed” to stabilize fit trends.
Thoughtful material and framework choices reduce adjustment burden and make outcomes predictable across batches; as an outsourcing dental lab collaborator, Raytops can pre-assign “material tiers” by indication so clinics get consistent results with fewer change requests。
How to Control Framework Precision for RPDs
Control RPD precision by setting clear tolerances, transmitting survey/undercut/relief data unambiguously, using framework try-ins when risk factors stack up, and catching warpage or porosity with early milling/casting checks. Lock these four items and remake risk drops fast.
What tolerance targets apply to major/minor connectors and clasp arms?
- Major connector flatness: ≤ 0.15 mm deviation on the reference model.
- Minor connectors/rests: seat depth 1.5 mm ± 0.2 mm; landing flush without rock.
- Clasp arms: planned undercut engagement ± 0.25 mm; tip thickness per library; elastic return verified on model.
How to communicate survey lines, undercut values, and relief areas clearly?
- Share a marked path of insertion and survey lines; specify undercut (e.g., 0.25 mm MB on #6).
- Attach a relief map (tori, flabby tissue) with thickness callouts 0.5–1.0 mm.
- Include insertion axis screenshot and clasp design from CAD.
When is a framework try-in advisable to prevent downstream remakes?
- Mixed dentition or compromised abutments; long-span distal extensions.
- Large connectors crossing palatal/lingual tori; uncertain bite or recent extractions.
- Any case with >2 critical adjustments expected from history; set “framework try-in required” before processing the final.
Which milling/casting checks catch warpage or porosity early?
- Flatness check on plate after divesting or de-supporting; reject if >0.15 mm.
- Visual and dye-penetrant check for micro-porosity near clasp shoulders and connectors.
- Gauge rest seat fit with feeler blades; no light show at seating.
- Record hardness/heat-treatment lot; re-blast and re-polish only after fit is confirmed.
Clear tolerances, explicit design data, and early verification make the framework predictable and cut chairside adjustments. As a global dental lab collaborator, Raytops can pin libraries, issue a one-page RPD precision sheet, and schedule framework try-ins only when risk indicators trigger.
Finishing and Aesthetic Standards for Removable Dentures
Finishing quality is consistent when tooth setup tolerances are documented, surfaces are polished to a repeatable grade, shade and lot data are traceable, and delivery photos plus a final QC checklist confirm the result before shipping. Turn these into auditable records to cut adjustments and complaints.
How to standardize tooth setup tolerances and occlusal schemes (documentation)?
| Item | Tolerance / Rule | Documentation |
|---|---|---|
| Midline | ≤1 mm deviation | Frontal photo with scale |
| Cant / occlusal plane | ≤2° from interpupillary | Right/left profile photos |
| Overjet/overbite | 1.0–2.0 mm / 0–1.0 mm (scheme-dependent) | Setup sheet + articulator record |
| Contacts | Even MIP, smooth excursions | Paper marks photographed |
| Scheme | Balanced or monoplane per case | Scheme noted (e.g., BPS system) |
What surface polish and base texture criteria should be verified?
- Intaglio free of grooves; borders rounded, no sharp edges.
- No visible 180–240 grit lines on cameo; glossy finish without haze.
- Posterior palatal seal sculpted per record; frenum relief preserved.
How to manage shade selection and lot tracking for consistent appearance?
- Record tooth shade (guide brand/code) and base shade.
- Capture lot numbers for teeth and acrylic; store with case ID.
- Photograph shade try-in under neutral light with gray card.
- Freeze chosen shade in design notes; changes require written approval.
Which photo angles and delivery checklists prove finishing quality on receipt?
- Photos: frontal, right/left 45°, occlusal top/bottom, intaglio, cameo macro, paper marks in MIP/excursions.
- Delivery checklist: model seating, midline, plane, contacts, polish grade, shade match, serials/lot numbers, torque cards if implants.
What final QC checklist should be completed before shipping?
| Area | Check | Pass Criteria |
|---|---|---|
| Fit | Base adaptation, PPS, relief | Seats without rock; PPS visible |
| Occlusion | MIP + excursions | Even marks; no high spots |
| Esthetics | Midline/plane/shade | Within tolerance; match photos |
| Finish | Polish/edges/texture | Smooth, glossy, no burrs |
| Docs | Photos/checklists/serials | Complete and archived |
How to document occlusal scheme parameters to reduce chairside adjustments?
- State scheme (balanced/monoplane), compensating curve, overjet/overbite, and vertical dimension.
- Include articulator settings and bite record type; attach contact photos.
- For recurring orders, clone the scheme profile so batch-to-batch articulation stays consistent.
When finishing standards are explicit and evidenced with photos and checklists, remakes drop and esthetics become repeatable. As an outsourcing dental lab partner, Raytops can package a one-page finishing spec with photo proofs so your team receives the same look and feel every time。
Implant-Supported Removable: Attachments, Libraries, and Components
Predictable implant-retained removables require three controls: the right attachment library (exact version), a traceable component list, and verified passive fit on bars/clips. Align scan bodies and cross-brand rules up front, then lock documentation before CAM.
Which attachment libraries (e.g., Locator/others) must be confirmed with the lab?
- Confirm system and library version: Locator, Novaloc/PEEK, OT Equator, Dalbo, or bar/clip families.
- Specify retention inserts (color/force), cuff height, tissue depth, and restorative space.
- Pin torque specs and driver type for abutment screws. See the official Locator attachments for insert options.
How to exchange component lists (part IDs, lot numbers) to ensure traceability?
- Export a CSV with columns: Implant brand/platform, site (FDI), abutment/analog/scan body part ID, lot/UDI, cuff height, driver, torque.
- Include bar material/finish, clip hardness, and spare kits.
- Attach photos of labels/bags; archive to case ID.
- On changes, issue RevN component sheet and freeze prior versions.
What verification steps reduce misfit on bars and clips during outsourcing?
- Fabricate a verification index/jig; test one-screw (Sheffield) passive fit on model and in mouth.
- Gauge bar straightness and twist on a plate; inspect solder/weld junctions.
- Seat clips on the bar, then check rock and dislodgement; adjust clip hardness only after passive fit is proven.
- Record final torque and take contact/radiograph evidence for the file.
How to coordinate scan body use and cross-brand compatibility?
- Use brand-specific scan bodies; avoid third-party unless validated and mapped to your library.
- Document platform (e.g., RC/NC), angulation limits, and library mapping for multi-unit vs. direct.
- Capture clear screenshots of scan body alignment; note sleeve offsets for guided cases.
- Reference manufacturer guidance.
Tying libraries, components, and passive-fit verification into one packet prevents chairside surprises. As an outsourcing dental lab collaborator, Raytops maintains an attachment matrix and a Rev-controlled component sheet so clinics can audit every part from scan to delivery。
Try-in Strategy and Feedback Loops Tailored to Removable
A predictable try-in process sets clear acceptance criteria, records every chairside adjustment in structured fields, triggers remake reviews at defined thresholds, visualizes trends on a dashboard, and binds it all with a support SLA plus training. When these loops run every month, variation shrinks and finals ship with fewer surprises.
Wax/PMMA try-in: what acceptance criteria prevent final-stage surprises?
- Midline ≤ 1 mm; occlusal plane cant ≤ 2°.
- Overjet 1.0–2.0 mm and overbite 0–1.0 mm according to chosen scheme.
- Even MIP marks and smooth excursions on articulator and in mouth.
- Base seats fully with no rock; pressure-indicating paste shows uniform intaglio contact.
- Retention appropriate to design (RPD clasp engagement or attachment inserts as planned).
- Phonetics: s/f sounds acceptable; esthetics confirmed with frontal and 45° photos and patient sign-off.
How to log chairside adjustments to feed CAPA for removable lines?
- Fields to capture: case ID, arch/region, issue type (fit/occlusion/esthetic/retention), adjustment action, time spent (min), tools/materials, reoccurrence flag, technician/operator, and root-cause code.
- Attach before/after photos and updated bite/design notes; increment design Rev and freeze deltas.
- Export a monthly CSV to populate Pareto and control charts. For training resources.
What thresholds should trigger a remake review?
- Same-case clasp or retention adjustments more than twice within 60 days.
- Try-in acceptance but final requires >15 minutes occlusal equilibration or significant esthetic reset.
- Unit/line remake rate >5% over last 30 cases, or >25% deterioration vs prior quarter.
- Any framework misfit after a recorded passive try-in.
How to visualize trends (dashboards) for continuous improvement?
- Control chart: adjustments-per-case over time by clinic and product line.
- Pareto: top 5 root causes (fit, bite, framework warp, shade, contour).
- CAPA board: open vs closed, average closure days, overdue items.
- Lead-time tiles: try-in approval-to-final CAM release, on-time delivery %.
What technical support SLA and training plan should be agreed for complex cases?
- Response tiers (e.g., same-day design review for urgent cases), file checklists, and named contacts.
- Quarterly training on scan/bite protocols, framework risk flags, and try-in photography.
- Shared template pack: acceptance checklist, adjustment log, and CAPA codes to standardize data.
A disciplined try-in plus feedback loop removes ambiguity and speeds approvals. As an outsourcing dental lab collaborator, Raytops can host the shared templates, maintain the dashboard, and co-run quarterly reviews so recurring cases become faster and more predictable.
Packaging, Turnaround Tiers & Cross-Border Handling
Predictable delivery for removable work comes from three things: clear lead-time tiers by product, packaging that prevents distortion, and logistics files that sail through customs with proper insurance. Decide these rules during onboarding and keep them identical on every shipment.
What lead-time tiers fit RPD frameworks, complete dentures, and implant overdentures?
- RPD frameworks: Standard 7–10 working days; Express 5–7 (framework-only); Add 2–3 if clasp/design change after try-in.
- Complete dentures: Try-in 3–5; Final 5–7; Complex esthetic setups add 2.
- Implant overdentures: Bar verification 5–7; Final 7–10 after passive fit approval.
- Rule of thumb: lock “design freeze” dates and put clinic approvals on the airway bill ref.
How to package frameworks and mounted cases to avoid distortion or damage?
- Secure frameworks on printed/milled models; immobilize with soft foam, never tight zip-ties on metal arms.
- For articulators/mounted cases, use transport locks or bite sticks; block out occlusal contacts with paper marks attached.
- Place dentures in rigid clamshells with spacer foam to protect borders; add desiccant for long-haul routes.
- Double-box: inner crush-proof carton inside outer box; include “Do not bend—custom medical device” note.
Which shipping options and insurance terms protect removable cases best?
- Choose express services with tracking and delivery guarantee; declare replacement value, not materials cost only.
- Use loss/damage insurance; photograph contents before seal.
- Mark as “custom-made dental prosthesis—no commercial value for resale” with HS code for dental devices; avoid lithium batteries or non-compliant aerosols in the same parcel.
What customs documents reduce hold-ups for removable materials and components?
- Commercial invoice: patient ID (masked), case type, HS code, unit not for resale, country of origin, and value basis.
- Packing list: itemized models, frameworks, dentures, components with counts.
- Regulatory: include IFU/SDS for resins or adhesives if shipped; note UDI/lot numbers for implant parts; attach clinic approval for repairs/returns.
- Consistency: keep invoice wording identical across shipments to match broker rules.
When packaging is rigid, approvals are frozen, and documents are precise, cross-border shipments clear faster and arrive intact. As an outsourcing dental lab partner, Raytops can standardize the packing kit, set default lead-time tiers, and prefill customs templates so repeat orders run on rails.
Conclusion
Consistent quality in removable outsourcing is not luck—it’s a system. Define category-specific KPIs, enforce a disciplined CAD/CAM handoff, choose materials and frameworks by indication, require risk-based try-ins, and prove finishing quality with photos and checklists. Lock packaging and cross-border documents so deliveries arrive intact and on time. As an outsourcing dental lab partner in China, Raytops works to your playbook—pinning libraries, freezing revisions, and reviewing trends monthly—to reduce chairside time and make outcomes repeatable across batches. For clinicians standardizing removable lines, proven industry methods such as the BPS denture system complement this governance-first approach.
